
Making a Bluetooth speaker provides you the freedom to customise and modify it to meet your specific needs, as well as the thrill and satisfaction of creating something with your own hands. Sure, it’s easier to go to any store and get one, but that’s not enjoyable.
If you enjoy getting your hands dirty, now is the time to get creative and create your own one-of-a-kind Bluetooth speaker to play your favourite music and impress your friends. You might be wondering where to begin. First, let’s make sure you have all of the necessary components.
What you need to make a bluetooth speaker
You will need the following components to make your own custom Bluetooth speaker:
- Two small speakers
- Bluetooth amplifier board
- Battery charging system
- One or two rechargeable 18650 batteries
- 3D printer and filament (you could use wood instead, however)
- Assembly tools (wires, screws, a screwdriver, superglue, and soldering iron)
Step 1: Prepare Your Speaker Box
You can prepare your speaker’s box in a variety of methods, the most typical being with wood or other materials. However, for this project, we will employ 3D printing, which reduces the requirement for precise measurements.
We can immediately obtain a compatible 3D-printable box from several websites that offer free 3D printing files because we will be using the 2-inch JINGERL full-range speaker. In this project, we will use Mediamilan’s Retro Bluetooth Speaker enclosure; the files may be downloaded from Thingiverse. If you can’t locate a case that fits your speakers, you can design your own using 3D modelling software.
Step 2: Download and Prepare the Files for 3D Printing
Once you’ve decided on the best speaker box to use, or if you’ve built one using CAD software, it’s time to get it ready for 3D printing. To accomplish this, you must use a 3D printer slicer such as Cura to create a G-code file that the 3D printer can read.
Make sure you slice all four parts: the battery holder, speaker backdoor, speaker case, and speaker trim. When you’ve finished slicing, save the G-code and send it to the printer.
Step 3: 3D Printing the Bluetooth Speaker Box

To begin 3D printing, prepare your 3D printer by levelling the bed and adjusting the bed offset. Some 3D printers merely require you to select automatic bed levelling on the screen, after which it will begin levelling the bed on its own (as seen below), eliminating the need for you to do it manually.
Other simple but crucial parameters are Z-offset and filament preheating. To set the Z-offset, navigate to Menu > Leveling and pick Z-offset. Adjust the height until you’ve found the ideal setting for your machine. Next, select Preheat PLA (the material we will use).
If you’re using ABS, choose Preheat ABS instead. More settings can be found under Menu > Prepare. Finally, select Print from SD Card from the menu options, choose your model, and begin 3D printing.
The settings will change based on the printer, so yours may not appear precisely like our example. When you finish 3D printing, you should have the following parts.

When 3D printing battery holders, remember to rotate the object on the slicer so that the two corners face up. If you wish to print them face down, you must experiment with the settings until you find the correct one; otherwise, the image will be damaged, as illustrated below.
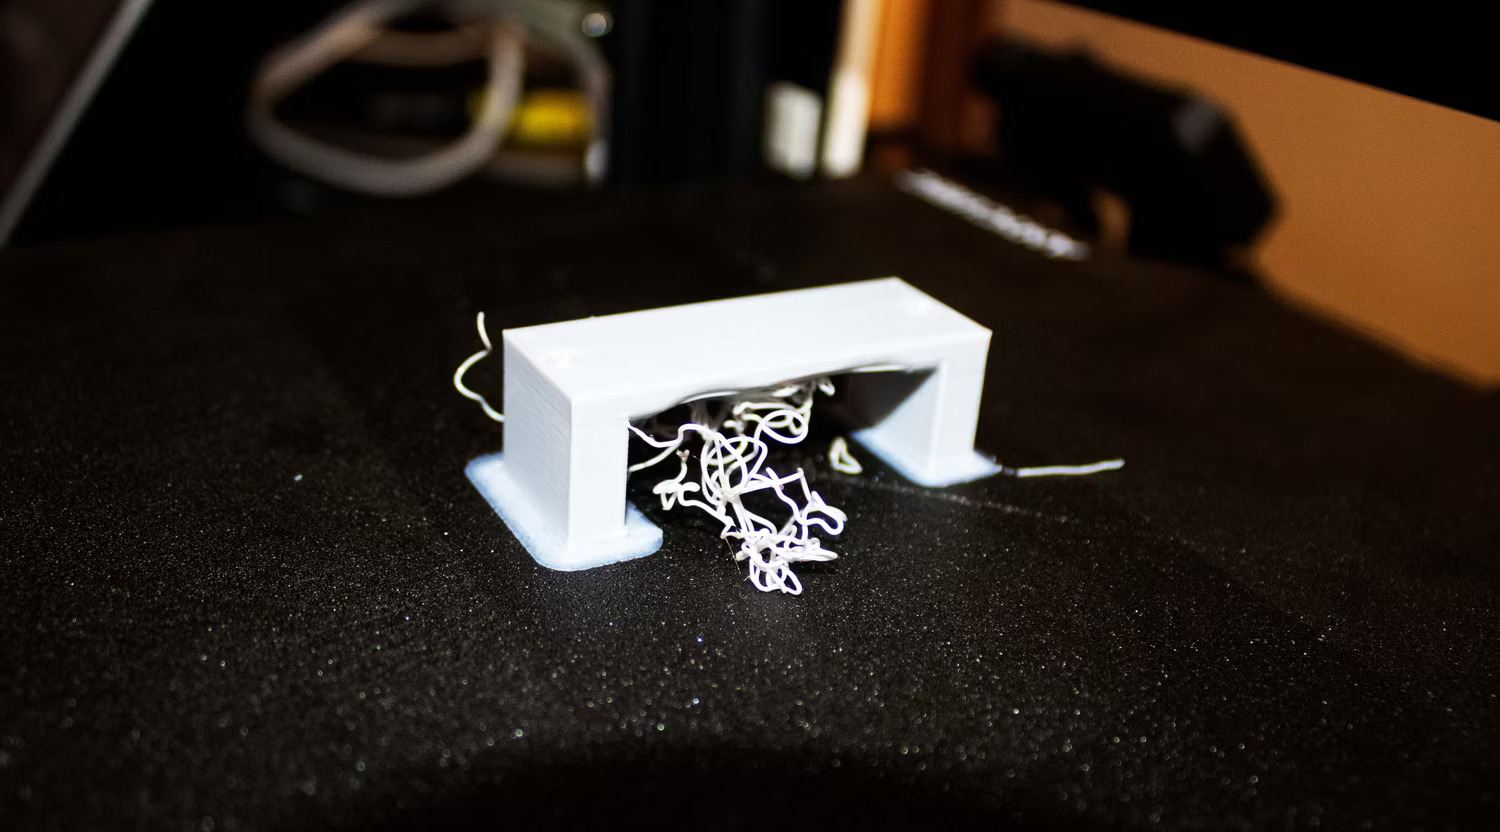
If you orient it at the right angle, there is no need to use specific settings because the printer will handle it effortlessly, as show below.

If you orient it at the right angle, there is no need to use specific settings because the printer will handle it effortlessly, as show below.
Step 4: Finishing and Painting 3D Prints
Once you’ve finished 3D printing, start by removing any excess material and smoothing the edges. If you have sandpaper, you can use it to smooth the print and erase any surface defects.
Next, paint it according to how you want it to appear. In our situation, we’ll paint the outer front portion blue. To begin painting, apply a primer to the print to provide a smoother surface for the paint to cling to. Once the primer has dried, it is time to apply the paint.
Depending on your inclination, you can use acrylic or spray-on paint. Use thin layers of paint to avoid runs and streaks. After painting, add glue around it, as seen below.
The glue helps ensure that the front trim readily adheres to the Bluetooth speaker box.
Step 5: Connect Amplifier to Speakers

Purchase an audio amplifier board—for example, the tiny amplifier board 3.7V 5V—designed for DIY speakers. As seen above, attach four wires to the amplifier. Make sure you fasten them properly. That is, connect the positive wire to the amplifier’s positive terminal. Next, connect the cables to the two speakers, as illustrated below.

This is an important step as it will be the foundation for your speaker.
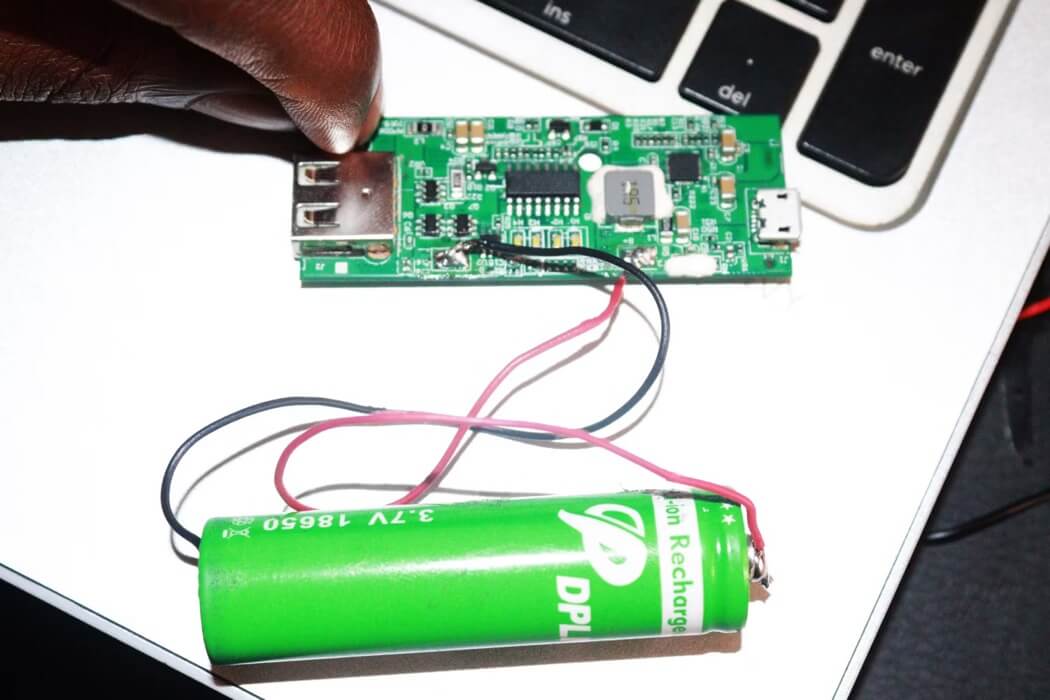
Step 6: Connect Battery to Charging System
We will use a power bank charger PCB board, which is cheaper and available on eBay. If you have a power bank that you no longer use and whose charging mechanism works properly, you can disassemble it and use the charging system for your Bluetooth speaker.
To connect the battery, first connect two wires to its positive and negative terminals, as displayed below. Connect the two wires to the charging system, each to its own terminal, as illustrated below.
Then, use a total of four screws to secure the battery holders to the speaker trim.
After that, take the battery and insert it into the holder as shown below.
The battery holder holds two batteries, so you may add another one. Make sure to attach all surfaces with screws that hold tightly.
Step 7: Connect Amplifier to Charging System
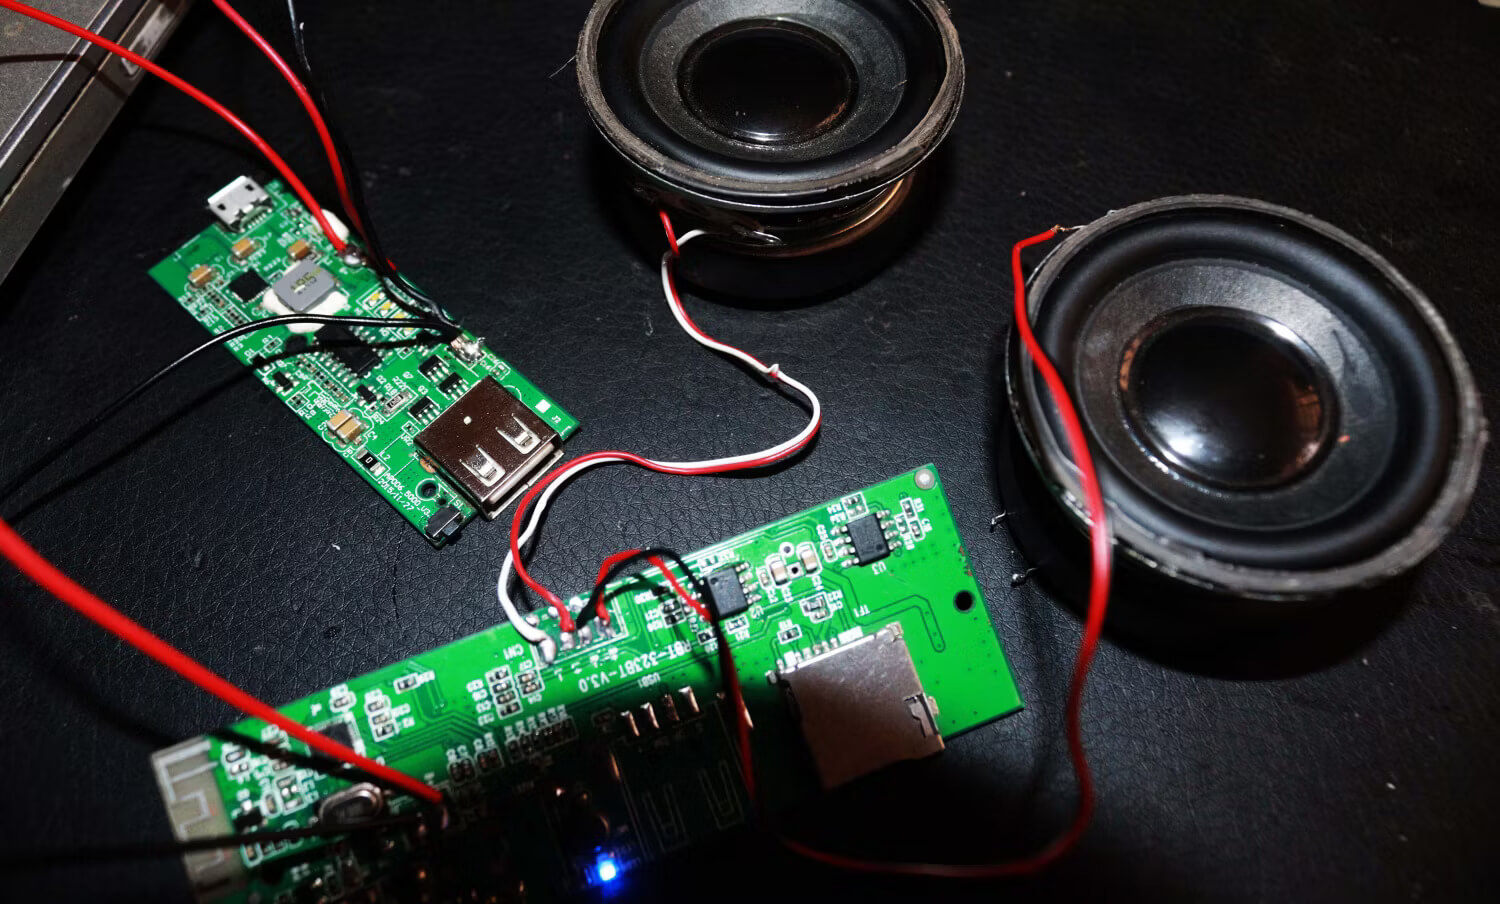
To make the connections, we’ll need wires and a soldering iron. You can also use solder flux to clean the part and ensure a good connection between the wires and the surface. Once you’ve applied the required amount of flux, heat up your soldering iron and begin soldering the connections.
Once the solder melts and is in place, remove the iron and let it cool. Finally, check the solder joint to ensure it is secure. When everything is functioning properly, the amplifier should display a blue signal.
Step 8: Put All Components Into Box
Insert the two speakers into the speaker box and use the superglue to secure them, as displayed below.

Even if the speakers fit the casing perfectly, it’s still vital to apply superglue to hold them together so they don’t move or vibrate excessively, which could lower the system’s sound quality. As indicated below, place the amplifier, batteries, and charging system inside the speaker housing.
As you do so, be careful not to disconnect any wires. Once you have put everything in place, you should be ready to enjoy a functioning Bluetooth speaker.
Step 9: Pair and Test Your Speaker
It will be in Bluetooth mode by default when you use the amplifier’s switch button to power on the speaker and see the blue signal. After that, you can pair it with your laptop or phone.
Turn on Bluetooth on your laptop or phone to begin pairing; the speaker’s name should appear. Play some music once you’ve paired with it to make sure everything is operating as it should.
Enjoy a Functional Handmade Bluetooth Speaker
Making your own Bluetooth speaker is a fun and cost-effective project. Your imagination is the only thing stopping you from creating something original. The good news is that the majority of the parts we’ve listed to make this speaker are reasonably priced.
If you don’t have access to a 3D printer, you can use wood to make the speaker’s housing. Just be sure to measure precisely to ensure that everything fits properly.
